Can Mold Grow On Plaster Walls? (ways To Treat And Remove)
TL;DR: Yes, mold can grow on plaster walls, especially if the plaster is wet, painted, dirty, or damaged. Immediate action is essential to fix any leaks to prevent further moisture accumulation, as wet plaster can become unstable and may fall. Traditional plaster is not inherently mold-resistant, though specialized materials like paper-free plaster can offer some resistance. Cleaning mold from plaster walls should not rely on bleach, as it only addresses surface mold. Effective cleaning agents include trisodium phosphate (TSP) and mold-resistant primers like Kilz. Proper ventilation and humidity control are crucial to prevent mold growth, using dehumidifiers or exhaust fans can help. In severe cases, professional mold remediation is recommended, as DIY methods may not fully eliminate mold and could spread spores. For instance, if mold is found on both sides of a plaster wall due to plumbing leaks, removing affected materials and using personal protective equipment (PPE) are advised. Ensuring proper insulation and avoiding drying clothes indoors can reduce condensation and mold risk. Regular maintenance, moisture monitoring, and using mold-resistant treatments can help prevent mold recurrence on plaster walls.
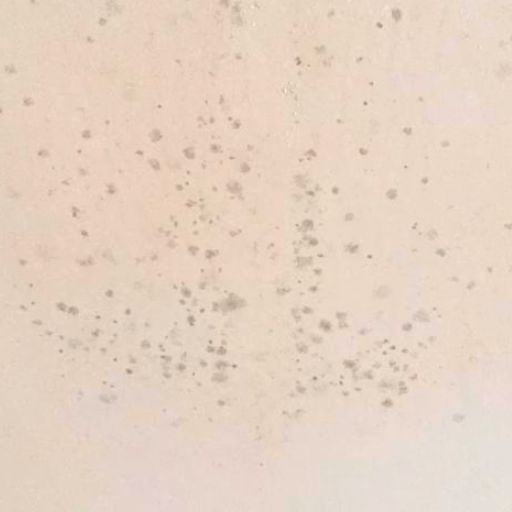
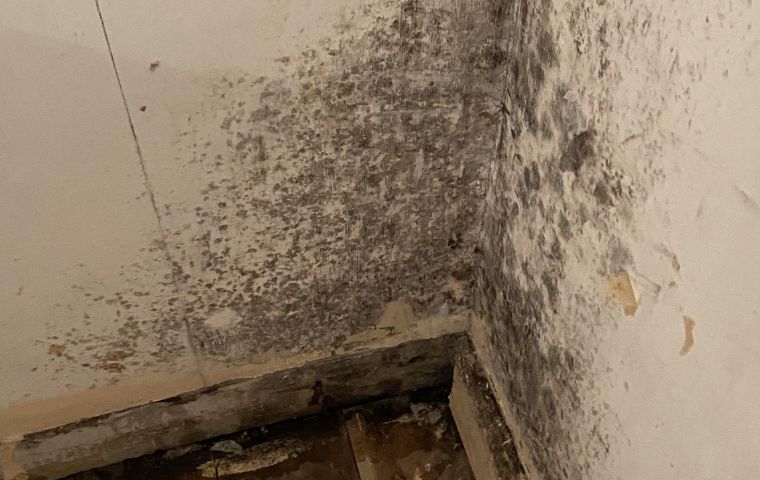
If you’ve ever noticed ugly spots on your plaster walls, you’re not alone. Many homeowners wonder: can mold grow on plaster walls? It’s a common worry, especially when there’s a leak or high humidity. Whether your home is new or old, moisture can lead to black or white mold, which can cause health problems and damage your home. If you’re dealing with mold behind plaster walls that keeps coming back, cleaning methods that don’t work, or you’re concerned about health issues, this guide is for you. We’ll look at how mold grows on plaster walls and how to get rid of it.
What Is The Difference Between Plaster And Drywall?
The difference between plaster and drywall is significant in terms of composition, installation, durability, and aesthetic qualities. Plaster is made from a cement-based mix that’s usually put on in several layers: scratch, brown, and finish coats. This method takes a lot of work and needs skilled workers, which makes plaster more costly and slower to install than drywall. On the flip side, drywall is made of gypsum wrapped in paper. This design allows for faster installation and lower costs, making it a favorite for new buildings and DIY projects.
Durability is another key point to consider. Plaster is known to last a very long time—often hundreds of years if taken care of properly. Drywall, however, usually lasts about 30 years before problems like mold can start, especially in damp areas like bathrooms. Plaster also offers better soundproofing and fire resistance, making it a safer choice in some cases. But when it comes to fixing things, plaster repairs can be tricky and need special skills, while fixing drywall is usually easier and more straightforward.
In terms of looks, plaster gives a smooth, seamless finish without any visible seams. This can add a classic and high-quality feel, especially in older homes. Drywall, on the other hand, often shows seams and fasteners, which can take away from its appearance.
When deciding between plaster and drywall, homeowners often think about their budget, the look they want, and the condition of their home. Some might choose drywall for its ease and practicality, especially during renovations. Others may want to keep or restore plaster because of its historical value and craftsmanship.
Does Mold Grow Faster On Plaster Or Drywall?
Mold can grow on both plaster and drywall, but how fast it spreads depends on several factors. These include moisture levels, how well the area is ventilated, and the specific conditions of each material. Mold tends to thrive on plaster walls, especially if they’re painted, dirty, or damaged. In older buildings, structural problems can lead to moisture getting in, which makes mold growth worse. For example, there was a case where a plaster wall developed black mold, even after it had been treated to prevent dampness. In this case, condensation and poor ventilation were key issues.
Drywall is also at risk for mold growth, particularly if it’s not stored properly or is put up in humid areas. New plasterboard can show signs of mold just weeks after it’s installed. This often happens because of cold bridging, where moisture collects on the cold surface of the plasterboard. High humidity can cause condensation, and when that combines with cooler surfaces, it creates a perfect spot for mold to grow.
When it comes to managing moisture, drywall might have a slight edge over plaster. When drywall is primed with water-based products, it can allow some moisture to pass through. This can help reduce the growth of mildew compared to plaster that’s sealed tightly with oil-based primers. Good ventilation is essential for both materials. For instance, using exhaust fans in places like bathrooms can help lower humidity levels, which can keep mold at bay. Properly sized exhaust fans can help maintain indoor humidity between 30-50%, which is crucial for preventing mold.
What Causes Mold To Grow On Plaster?
Mold growth on plaster mainly happens because of moisture and conditions that help fungi thrive. Some key reasons for mold development include high humidity, poor airflow, and organic materials found in the plaster. Plaster, especially gypsum plaster, is very porous and can soak up moisture from the air. This creates a perfect environment for mold spores.
When the relative humidity (RH) levels go above 60%, especially over 90%, mold growth becomes much more likely. For example, lime plaster samples exposed to 96% RH showed visible mold growth in just three weeks. In contrast, samples at RH levels of 75%, 80%, and 86% did not develop mold in that same time frame.
In older buildings, like those from the late 1800s, the lack of proper insulation and ventilation can make moisture problems worse. This leads to condensation on cooler surfaces. It’s especially an issue in rooms that aren’t used often, don’t have heating, or have been renovated without fixing moisture issues first.
For instance, removing chimneys can cut down on ventilation, which can increase mold growth. Also, using non-porous coatings like distemper or emulsion paints on plaster can trap moisture and encourage mold. On the other hand, breathable coatings like lime wash allow for better moisture transfer and can help lower mold risks.
Different types of plaster, such as fibrous plaster and lime plaster, react differently to mold growth. Gypsum plaster, which is made of calcium sulfate dihydrate, hemihydrate, and anhydrite, has a porous structure that helps fungi grow. Fungi can get into the tiny pores of the plaster, causing damage through a process called bio-weathering.
Fibrous plaster mixes gypsum with materials like hessian fibers (made from jute) or glass fibers, which are organic and can break down due to fungi. The enzymes that fungi produce can break down cellulose in the hessian fibers, which weakens the plaster.
Lime plaster, often used in places like India, has organic additives such as curd, jaggery, and Bel pulp. These materials create a nutrient-rich environment for mold. Lime plaster can absorb and release moisture, but high humidity levels increase the risk of mold. While lime plaster’s ability to buffer moisture can be helpful, too much humidity can lead to more mold growth.
How Do You Know If Mold Is Behind Plaster Walls?

To find out if there’s mold behind plaster walls, you can look for some clear signs and use a few methods. First, remember that mold loves damp places. So, if you see any signs of water damage—like stains, peeling paint, or if you smell something musty—take it seriously. These signs often mean moisture is getting into the plaster. Also, mold can grow on the surface of plaster, especially if it’s dirty, painted, or damaged. That’s why checking for any discoloration or surface mold is really important.
You can dig a little deeper by using a moisture meter. This tool helps you check the moisture levels inside the wall. If it shows high moisture readings, it could mean mold is forming behind the plaster. Another thing to look for is the condition of the plaster itself. If it feels soft or crumbles easily, that might be a sign of mold growth, since wet plaster can become weak. It’s also a good idea to check for leaks in your plumbing or roof. These are common sources of moisture that can help mold grow.

How To Treat And Remove Mold From Plaster Walls?
To treat and remove mold from plaster walls effectively, identify and fix moisture sources, use cleaning solutions like Trisodium Phosphate (TSP), apply a mold-resistant primer, and ensure proper ventilation. Safety precautions are essential during the process to prevent health risks from airborne mold spores.
Here are the steps you can follow to treat mold on plaster walls:
Step 1: Identify And Fix Moisture Sources
The first crucial step is to identify and address the source of moisture that is enabling mold growth. This could include leaks, poor ventilation, high humidity levels, or even issues with the building’s construction, such as lack of proper insulation or the use of incompatible materials (e.g., gypsum plasterboard in older properties). Thoroughly inspect the affected area and surrounding structures to pinpoint the origin of the moisture problem.
Step 2: Clean Affected Areas
After fixing the moisture problem, it’s important to clean the affected areas well. Don’t use bleach, because it only works on the surface mold and doesn’t reach deeper layers. Instead, try Trisodium Phosphate (TSP). It’s great for cleaning and killing mold spores. You can also use specialized products like HG Mould Spray, Polycell Mould Treatment, and Cillit Bang Mould Spray. For the first round of cleaning, a fungicidal or moldicide wash can be helpful too. Just be careful with ammonia-based cleaners; they might not be the best choice for plaster walls.
Step 3: Allow To Dry
After scrubbing the affected areas, allow them to dry completely. This step is crucial to ensure that no moisture remains, which could encourage mold to return.
Step 4: Repair And Prevent Future Mold Growth
Once the area is dry, address any underlying structural issues that may have contributed to the mold problem. This may involve:
- Repairing leaks in the plumbing, roof, or walls to prevent further moisture buildup.
- Improving ventilation by installing exhaust fans, opening windows, or using dehumidifiers to manage humidity levels.
- Replacing damaged materials, such as drywall or insulation, if the mold has penetrated deep into the plaster or underlying structures.
- Applying mold-resistant treatments, such as primers, sealants, or specialized paints, before repainting the area.
In some cases, replacing the affected plaster or using alternative plastering materials, like lime-based plasters, may be necessary to prevent recurring mold issues.
Step 5: Repaint With Mold-Resistant Paint
After the primer has dried, repaint the area with high-quality, mold-resistant paint. This step not only restores the wall’s appearance but also provides additional protection against future mold growth and helps in easily identifying any new mold growth.
Step 8: Consult Professionals If Necessary
If the mold problem is extensive or if there are concerns about hidden mold behind the plaster, consulting a professional mold remediation service may be necessary. Professionals can effectively remove mold, identify any structural issues contributing to moisture problems, and provide guidance on whether materials need to be replaced or if thorough cleaning and sealing will suffice.
Don’t Let Mold Linger On Your Plaster Walls
If you’ve noticed signs of mold on your plaster walls, it’s essential to act quickly to protect your home and health. At Mold Removal Memphis, we specialize in professional mold remediation services that go beyond surface cleaning to address the root causes and prevent mold from returning. Don’t wait for the problem to worsen—contact us today for a comprehensive mold treatment plan. Trust our experts to restore your home to a safe, mold-free environment.

